Last updated on Mar 08, 2023
How to Set Up Your Author Page on Amazon Author Central in 2025
Ricardo Fayet
Reedsy co-founder and Chief Marketing Officer, Ricardo Fayet has worked with hundreds of authors on their launches and marketing campaigns. He is the author of two bestselling guides on marketing for authors, and a regular presenter at the largest writers' conferences.
View profile →Most indie authors understand the pressure to join every platform that promises to help you market your books (Goodreads, Facebook, and BookBub, oh my!). But even if you're already feeling maxed out on book marketing tools, there’s one major resource that you shouldn’t overlook: Amazon Author Central.
Amazon Author Central allows you to customize your Author Page on Amazon, so readers can see who you are, what kinds of books you write, and — most importantly — why they should buy your books.
Read on to find out how to set up your Amazon Author Central account and create an Author Page that readers won't be able to resist.
What is Amazon Author Central?
Amazon Author Central is a marketing and sales-tracking hub for authors who publish their books on Amazon. The main benefit of Author Central is the customizable Author Page, which allows you to add information about yourself, such as an author photo and extended author bio for your readers. As of December 2022, the full text of your bio is tucked away on a separate tab of your Author Page, but it's still worth ensuring the page exists for any curious readers.
I'll discuss the Author Page in greater depth below, but just for context, here's the Amazon Author Page for bestselling author Rick Riordan:
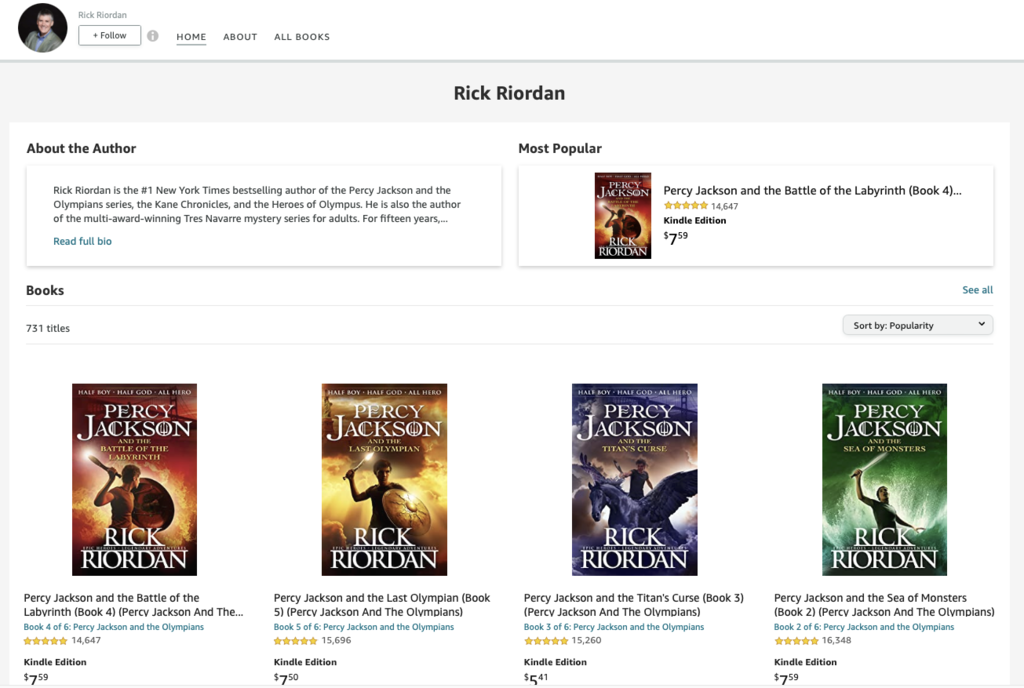
As you can see, Amazon Author Pages aren't just for indie authors; Big 5 authors have them, too. But as a self-publishing author, you're in charge of designing your own. This is why it's crucial to understand the Amazon Author Central platform and what it can do for you.
When you sign up, you'll gain access to an Author Central dashboard, with tabs for tracking your book sales and managing customer reviews. This is also where you'll navigate from when you want to edit your Author Page. Essentially, your dashboard is your home base on Amazon Author Central, so consider bookmarking it for easy access.
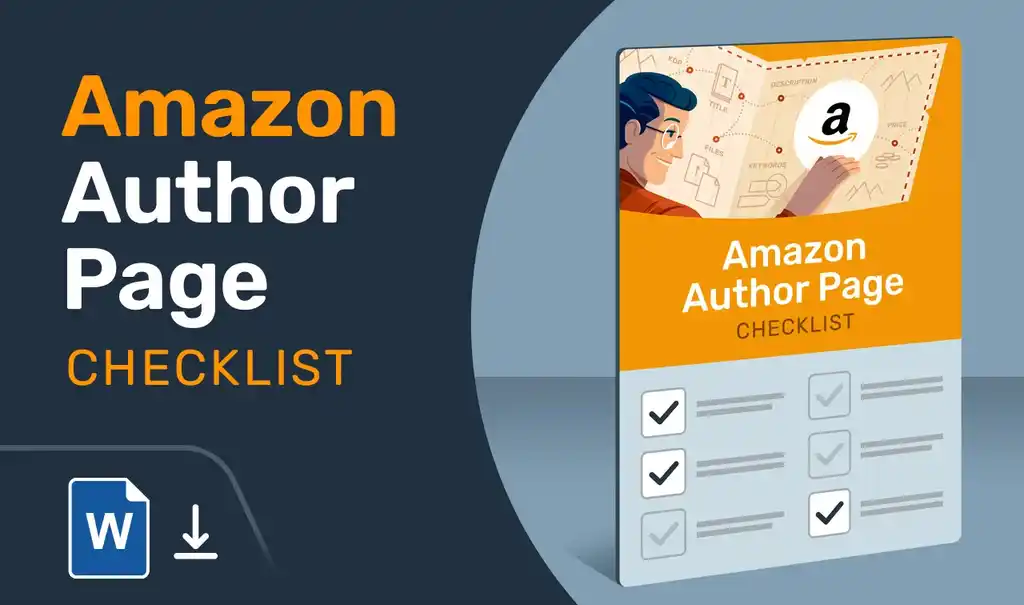
Now that I've gone over the basics of Amazon Author Central, you're ready to sign up and start exploring the platform. This next section provides step-by-step instructions on how to do that (but for a cheat sheet, download our checklist below).
FREE RESOURCE
Amazon Author Page Checklist
Our step-by-step guide will help you make the most of your author page.
How to set up your Amazon Author Central account
 1. Go to author.amazon.com and click “Join Now.”
2. Use your Kindle Direct Publishing (KDP) account to log in. (For authors looking to claim a book that's been traditionally published, you can log in with your regular Amazon account, or create a new one.)
3. Enter your author name, which should match up with the name that appears on your books. If you write under multiple pen names, don't worry — you can add them later from the “Books” tab of the dashboard.
4. Claim the book(s) associated with your main author name. If they don't show up, you'll need to contact Amazon directly. Note that you won't be able to activate your Author Central account until you've claimed a book.
5. Verify your account and begin setting up your Author Page!
Speaking of which, let's dive into the essentials of your Author Page and what you should add right away. Then, in the final section of this post, I'll talk about how you can go above and beyond to create an Author Page that's truly irresistible to readers.
Getting started with your Amazon Author Page
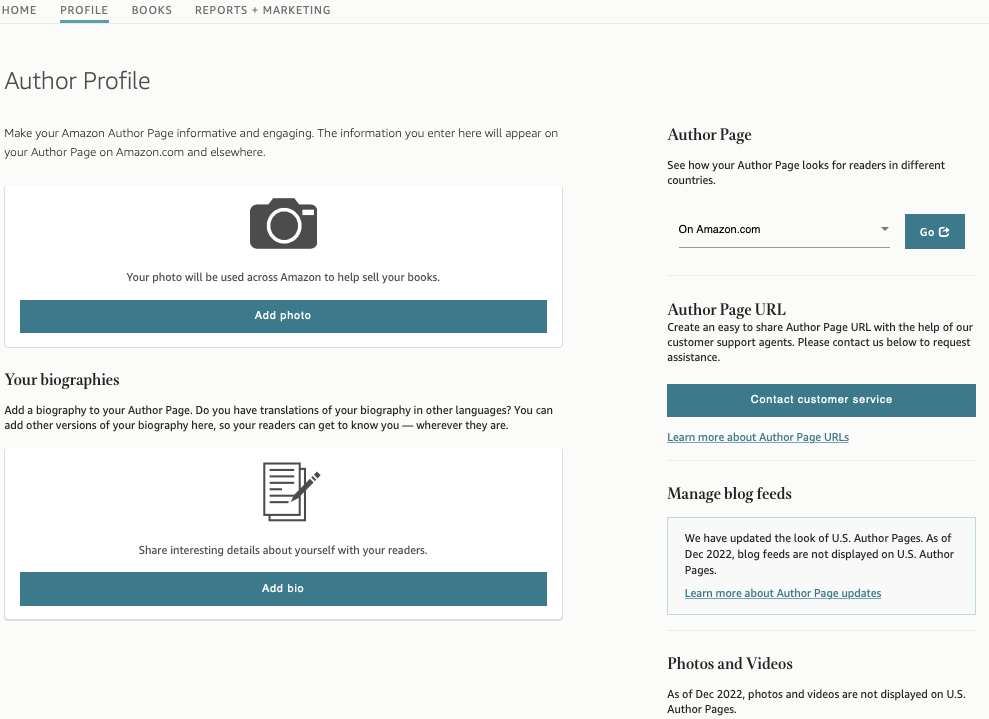
On the top left of the Amazon Author dashboard, you'll notice "Home" is followed by "Profile." That's where you'll head next, so you can set up your Author Page. It'll look like this:
1. Lead off with a strong author bio
Your Amazon Author page is all about you, the author — so first things first, get your author bio right! You can paste your bio in after clicking on "Add bio."
In terms of what your bio should look like, here's a great example from V.E. Schwab's Author Page:
Victoria "V.E." Schwab is the #1 New York Times bestselling author of more than a dozen books, including the acclaimed Shades of Magic series, This Savage Song, Our Dark Duet, City of Ghosts and Vicious. Her work has received critical acclaim, has been featured in the New York Times, Entertainment Weekly, Washington Post, and more, has been translated into more than a dozen languages, and has been optioned for television and film. When she's not haunting Paris streets or trudging up English hillsides, she lives in Nashville and is usually tucked in the corner of a coffee shop, dreaming up monsters.
This bio highlights Schwab's bestsellers, cites various other professional achievements, and adds a nice personal touch at the end. Aim for a similar balance in your own author bio — though if you don't have any bestsellers or high-profile reviews just yet, it's okay to veer more on the personal side.
Once you've noted your credentials, your book titles, and one or two fun facts, make sure to also share your social media profiles and/or blog, so readers know where to find you off Amazon.
2. Add an author photo

Adding an author photo is perhaps the easiest way to personalize your Author Page. Make sure the photo you upload is a high-definition color headshot, like the examples above. Bonus points for interesting attire or posing — though of course, professionalism takes priority here. You can add this by pressing "Add photo" at the top of your "Profile" tab.
📸 Completing your profile with further (relevant) photos
🚨 As of December 2022, photos and videos apart from the main author photo are not shown on Amazon.com Author Pages, but you can still display them on other regional Amazon sites (Amazon.co.uk, .de, .fr, etc.). If you only have a profile on Amazon.com, disregard the tips in this section and the next.
Add photos of you with your book, photos of you at literary events, and anything else that relates to your author “brand.”
To add these, find the "Photos and Videos" section at the bottom left of your "Profile" tab, and click "Upload media." You'll be allowed to upload files directly from your computer — just make sure they're in an acceptable format (JPG, GIF, PNG) and at least 300 pixels wide and tall, as per Amazon's requirements.
For instance, if you’ve written a story steeped in Celtic mythology, you might attach a picture of yourself on the Scottish Moors. Or if you've written a book about social media, you could include a photo of yourself formatted to look like it would on Instagram. Use this opportunity to get creative (though again, keep it professional — no photos of wild book launch parties, if you catch our drift).
🎬 Adding videos to your Author Page
You can add videos to your Author Page in the same way that you can add photographs — by clicking "Upload media."
- Ensure you own the rights yourself; it can't just be someone else's video you've downloaded from YouTube!
- After "Upload media," select “Upload video” and choose a file from your computer.
Many authors will choose to add a “book trailer,” public readings, or other things related to their works on their Amazon page. Whatever tack you take, ensure your video is in an acceptable format (MP4, AVI, WMV, FLV, MOV, MPG), smaller than 500MB, and less than 10 minutes long.
3. Customize your shareable URL
Finally, since you'll be sharing your Amazon Author Page on your website, social media, and with whomever wants to know more about you as an author, it's worth making your URL as clean as possible!
For this, all you have to do is select “Amazon Page URL” and create a new link, like so:
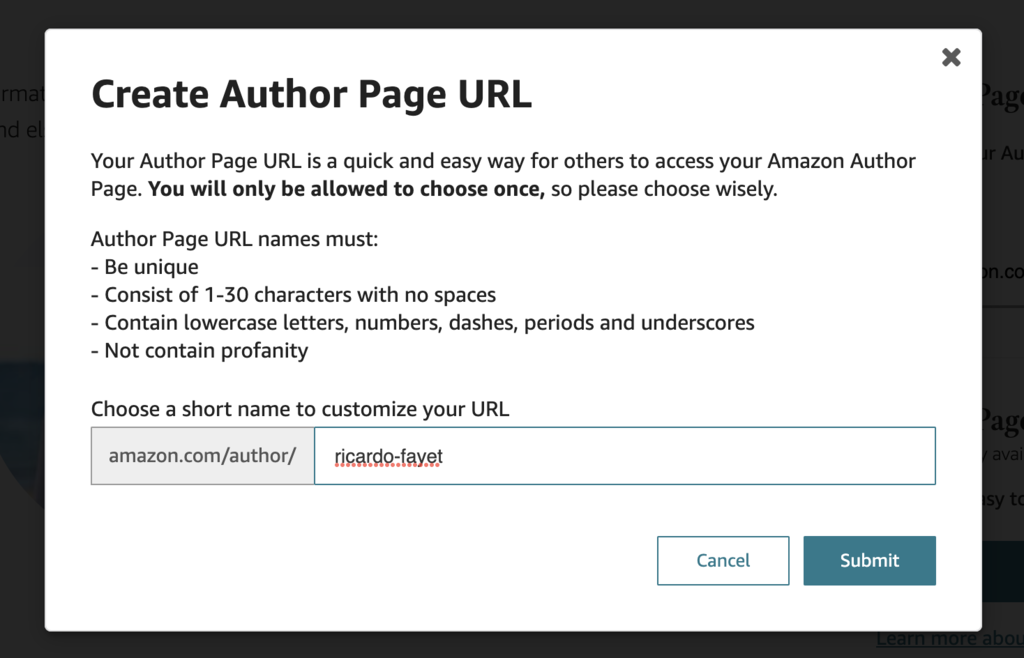
If your desired URL is not available, try some variations. Use your middle name, add hyphens, whatever works!
These four steps cover the bare minimum of setting up your Author Page on Amazon Author Central. But if you want go above and beyond (hint: you do), then check out these last few tips on more exciting things to add to your product pages and Author Page.
Taking your Amazon presence to the next level
Once you've set up the bare bones of your page, spend a little more time to make it blossom.
4. Claim more books
You claimed your main book(s) when setting up your Amazon Author Central account in the first place. But what if you've written other books under a pen name, or contributed to a book where you're not the sole author? Great news: you can easily claim those from the “Books” section of your dashboard as well!
🖊️ How to add books under a pen name
- Click “Add more books” under the “Books” tab
- Search for your other titles and select “This is my book”
- In the dialog box that pops up, select “This is me” next to your pen name
- Now you'll see another dialog box with the header “This doesn't look like your name” — make sure you've got it right, then click “This is my pen name” at the bottom to create a new Author Page!
You'll be able to edit the new page from your existing dashboard, but don't worry; adding pen names in your Amazon Author Central account will not link those Author Pages publicly.
Finally, note that each Author Central account can manage up to three pen names. After that, you’ll need to create an additional account under a different email address.
👯 How to add a book where you're a co-author or contributor
This is easy — so long as it's listed under your actual name, you can add co-authored books the same way you would your own book, by simply clicking “Add more books” and selecting your name as the author.
For books in which you are one of many contributors, just make sure the primary author or editor has listed your name as an author, and you should be able to follow the same process.
Then once you have all your books associated with your name(s), don't forget to...
5. Add editorial reviews
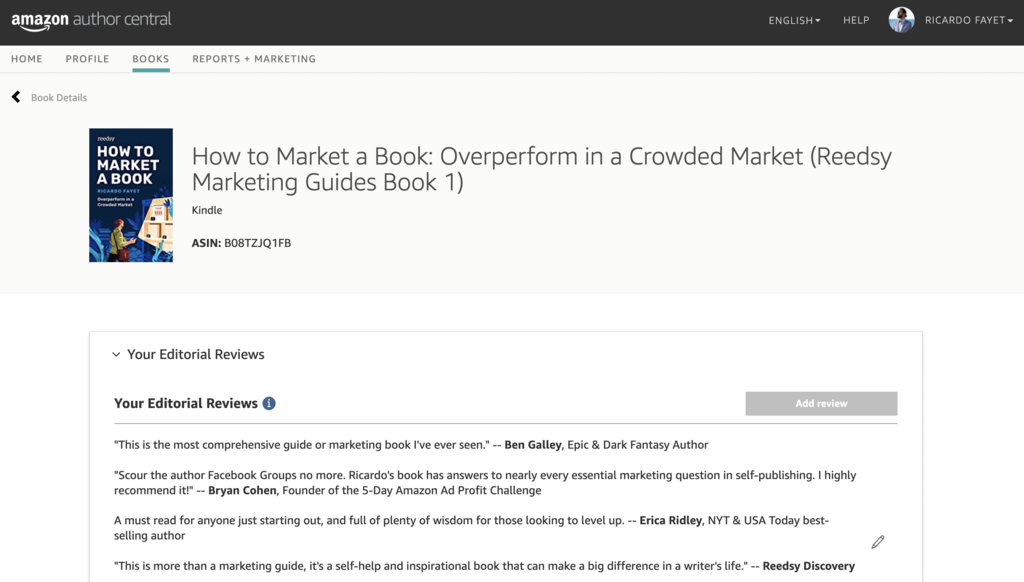
Other people's recommendations are one of the best conversion tools for your book! The Editorial Reviews feature of Amazon Author Central allows you to post this social proof right on your book's product page — so if you have great reviews to show off, make sure you take advantage.
Here's how to add editorial reviews from your Author Central dashboard:
- Select the “Books” tab;
- Choose the book for which you're adding a review, and click "Edit book details";
- Under "Your Editorial Reviews," select “Add review”;
- Preview the review and, when it looks good, hit “Submit.”
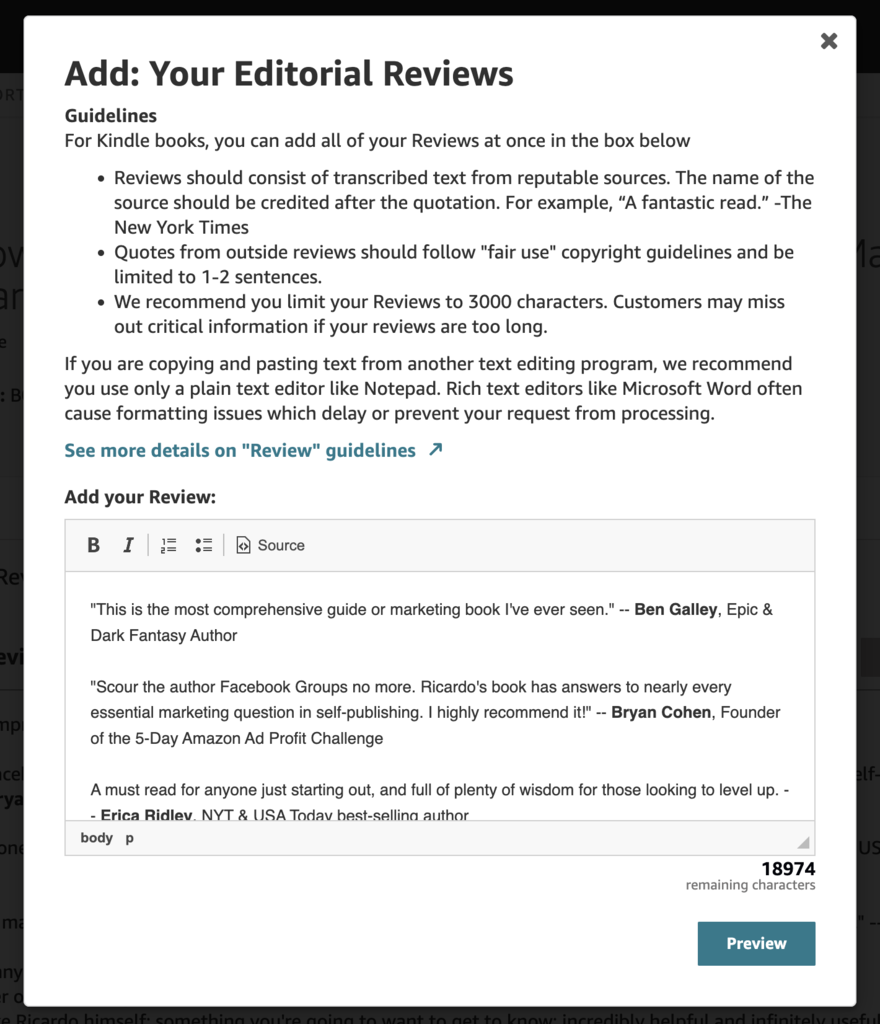
For Kindle books, you can only add a single book review; for physical books, you’re limited to five, and for audiobooks, you can add up to three reviews. It’s best practice to pick out the most impressive review snippets from reputable sources — be it a widely recognized figure, a notable outlet, or a popular book review blog.
However, your review doesn’t need to be from a seasoned critic or a bestselling author in order to be noteworthy! Positive feedback from a Reedsy Discovery editorial reviewer or from a reader on Amazon or Goodreads can also work wonders.
6. Add book recommendations
With the December 2022 re-design of the Author Page, Amazon added a new feature: book recommendations. The idea is that your readers can start at the right place by having tips from you about how to get acquainted with your work (especially if you have a large backlist), as well as get to know you and your influences a little better through a list of recommended works you can vouch for.
If you add at least three books to this section of your profile, Amazon says they'll 'consider' sending an email notification to your profile followers — but because this is a new feature, we don't yet know how often this happens, or what form it takes.
Here's how you can add book recommendations:
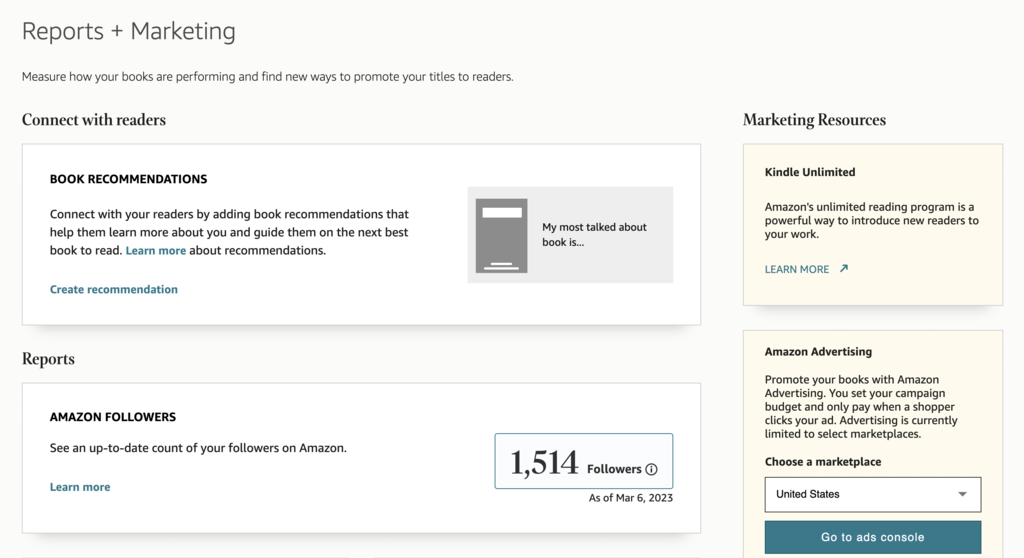
- Navigate to the "Reports + Marketing" tab.
- In the section titled "Connect with readers," hit "Create Recommendation."
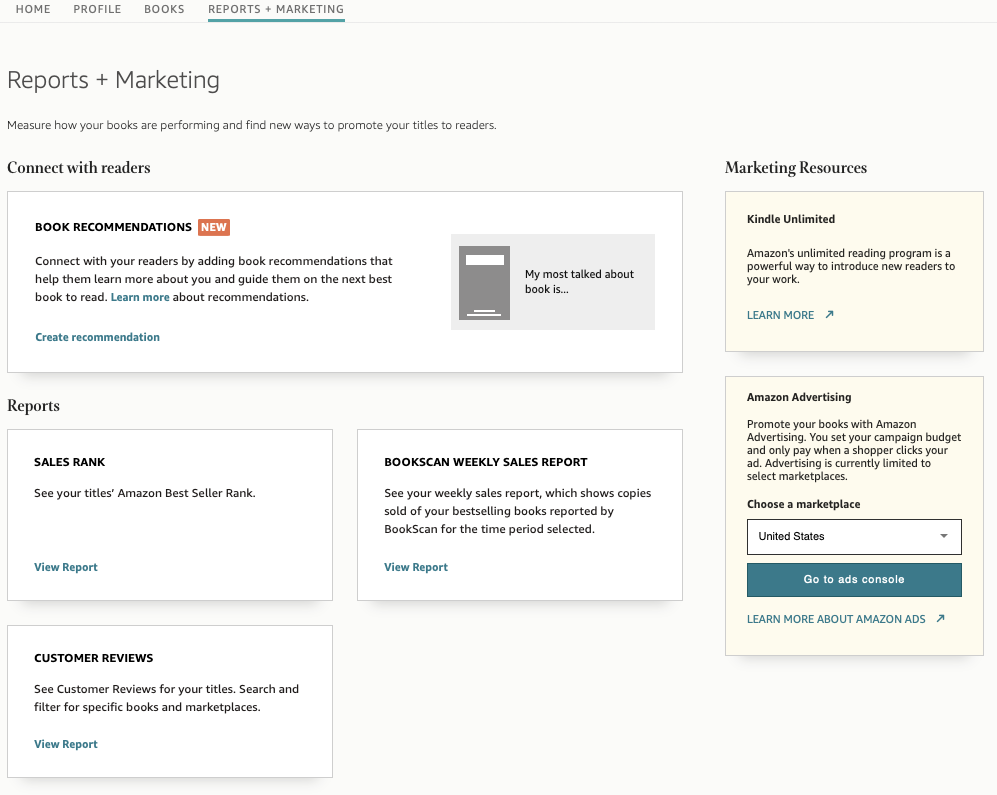
You'll then be given the following recommendation prompts for your own work:
- "My most talked about book is..."
- "My book I wish more readers knew about is..."
- "If you are new to my work, I recommend starting with my book..."
- "If you want to get lost in a story, I recommend my book..."
For books by other authors, the prompts are as follows:
- "If you like my work, I think you'll like..."
- "A book I couldn't put down was..."
- "A book that left an impression on me was..."
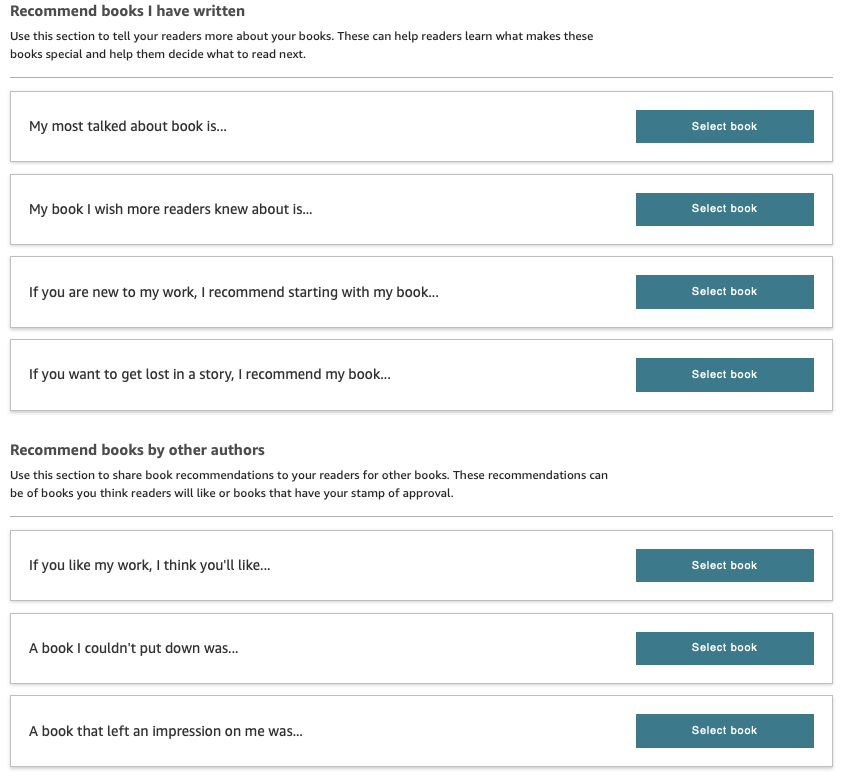
To add books to any of these prompt sentences, hit "Select book." You'll be allowed to add books from your profile, or search for any title available on Amazon. After that, confirm you chose the right book, click "Submit," and allow one business day for the recommended book to appear on your profile. All set up!
Wondering what book recommendations look like once they've been approved? Check out my Amazon.com profile. If you scroll down, you'll see his recommendations underneath his published works:
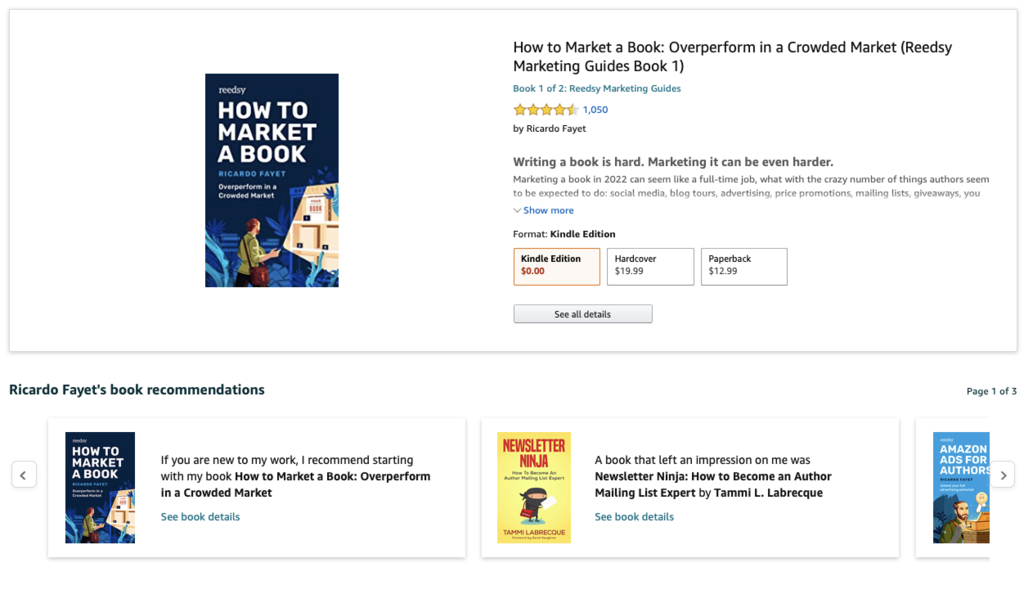
The more followers your Amazon Author Central profile can secure, the more people are likely to be notified whenever you release a new title. You can check the number of your followers in the Reports and Marketing section of your Amazon Author Central dashboard. It'll look like this:
7. Update your international accounts
Amazon Author Central is available in more than just the US. And if you’re already taking the time to iron out one version, you may as well go the extra mile and set up your pages for international markets! Author Central UK may be particularly helpful if you write English-language books.
You can sign up to various international Author Centrals here:
- United Kingdom: https://author.amazon.co.uk
- Germany: https://author.amazon.de
- Japan: https://author.amazon.co.jp
- France: https://author.amazon.fr
Pro tip: Translate your author information into the appropriate language if possible. If you don't speak it, look for an actual person to translate your work, as using Google Translate will result in some wonky phrasing for native speakers!
8. Keep things fresh
The most important thing to remember when it comes to your Author Page is to actually update it. Consistently polish your bio and add new photos, videos, and other information, removing anything that's become outdated. Ensure your Author Central Page feels current to potential readers by updating it at least once a month, ideally more.
It's true that without a robust profile and portfolio, your Author Page is nothing more than a flat list of whatever books Amazon thinks it can attribute to you. But with a bit of elbow grease, it becomes a one-stop digital storefront for your books and your author brand!
Indeed, never underestimate the power of the Amazon Author Page. As an indie author, you need to take advantage of every tool at your disposal — and Amazon Author Central account is one of those tools, so use it to the best of your ability.


