Last updated on Oct 15, 2025
The Snowflake Method: 6 Steps to a Powerful Story Outline
Martin Cavannagh
Head of Content at Reedsy, Martin has spent over eight years helping writers turn their ambitions into reality. As a voice in the indie publishing space, he has written for a number of outlets and spoken at conferences, including the 2024 Writers Summit at the London Book Fair.
View profile →In the annals of ‘unhelpful writing tips offered to first-time novelists,’ Neil Gaiman’s oft-repeated opinion takes the cake: “You sit down at the keyboard and you put one word after another until it’s done. It's that easy, and that hard.”
If you’ve never written a novel before (and you don’t have an MFA in creative writing), it's only understandable that you’re daunted by the prospect of drafting a book. This uncertainty is precisely why outlining systems, such as The Snowflake Method, are so appealing to developing writers.
If you want to find out how to use the snowflake method, feel free to skip ahead to this section. But if you have a moment, let’s first look at the basics of this popular approach.
What is the Snowflake Method?
The Snowflake Method is an approach to writing that encourages starting with the simplest premise possible. From there, you systematically expand it to include plot and character details. Developed by American author, physicist, and writing coach Randy Ingermanson, the method's end result is a comprehensive character bible and scene list with which an author can begin the first draft.
“My power flurries through the air into the ground. My soul is spiraling in frozen fractals all around” — “Let It Go” from Disney’s Frozen
Given Ingermanson’s background as a computational physicist, it should come as no surprise that his method was inspired by a mathematical principle known as a fractal. In particular, he references the Koch Snowflake to demonstrate how your story grows with each subsequent stage of the outlining process.
It's probably no surprise to you to learn that every writer uses a different outline. If you're curious about the general outlining process, we dive deeper into the topic in this post on how to outline a novel. (Feel free to grab the free book outline template in there as well!) But for now, let's talk about the advantages of this particular method.
What are the benefits of the snowflake method?
Fans of Ingermanson’s method tend to enjoy how structured the process is. Not only does he lay out practical steps for outlining, but he also gives an idea of how long each step should take. For example, he suggests spending an hour on the very first step of honing a single-sentence story summary. Later on, when writing a character bible, he recommends spending a few hours on each character.

The Snowflake Method also identifies and fixes a common cause of Abandoned First Draft Syndrome: plot holes. It’s common for writers to be 20,000 words into a first draft before noticing major story issues that they need to go back and fix.
By working toward a scene list and, more importantly, synopses for every character, you can better identify plot holes before you even start chapter one. If the butler commits a murder in Chapter 20, you can make sure he isn’t imprisoned for life in Chapter 12.
With the help of the Snowflake Method, many writers have been able to follow-through and complete a draft of their novel where previously they may have failed.
How to use the Snowflake Method to write a novel (in 6 steps)
Without giving away every detail of Ingermanson’s process, here’s a quick look at how you can use the snowflake method to write a novel:
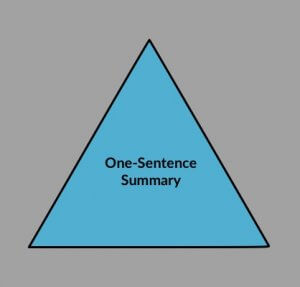
Step 1: Write a one-sentence story summary
Encapsulate what your novel is about in a single sentence. You might also call this ‘the hook’: a line that you can use in almost any situation to get anybody interested in your book.
A revenge-obsessed whaler embarks on a deadly voyage to hunt the beast that took his leg.
Or
Whisked away to a magical boarding school, an orphaned boy discovers that he’s a famous wizard.
This practice will be closely related to the central idea of your novel. When constructing this single sentence, it’s important to avoid specifics. A character’s name isn’t as useful as a reference to their personal goal, for example. For this step, writers are urged to keep their sentences under 15 words long.
Step 2: Expand it to a one-paragraph summary
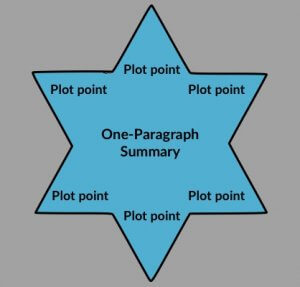
If you are imagining the snowflake analogy, this is when the triangle turns into a star. Building off the details in your one-sentence summary, add a few elements here and there until you have retold your story in five sentences.
This is where you will introduce your major plot points. If you’re a fan of the three-act structure, you’ll want to include:
- The exposition (what is the status quo at the start of the story)
- The first plot point (what major event kicks off the story),
- The mid-point (where things take a turn for the worse), and
- Plot point two (where your character hits rock-bottom and starts turning things around)
- Climax and denouement (how the story resolves)
It’s worth putting time into getting this summary just right. You can always come back to revise it if things change, but having these plot signposts in place will help guide the next few steps.
Step 3. Start small with your characters
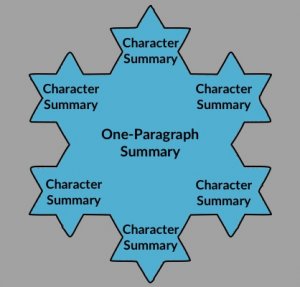
Now that you’ve started expanding your view of the plot, Ingermanson suggests shifting down a gear and painting your characters with broad brushstrokes.
This is where you identify all the major characters in your book, give them names and spend an hour identifying their:
- Motivations (what drives them in life)
- Goals (what non-abstract things do they want)
- Conflict (what prevents them from achieving their goal)
- Epiphany (how they overcome that conflict)
It’s worth considering both their external and internal struggles. If a character’s goal is to get that big promotion, then their conflict might be with the bully from HR (external conflict) and their own self-confidence (internal conflict).
At the end of this stage, you’ll have an idea of the major players’ individual storylines.
Step 4. Expand your one-paragraph summary into a single page
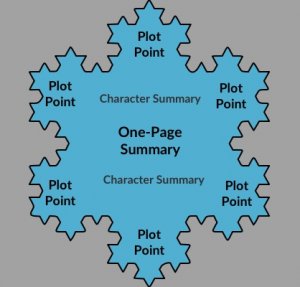
Ingermanson sees this stage as taking a few hours, as you blow out each sentence of your one-paragraph summary (step 2) into a full paragraph. To develop your story into blocks that are easy to understand and write, you can end every paragraph with what he calls a ‘disaster’ — which you might interpret as a major plot point or a cliffhanger.
Step 5. Character bibles and character synopses
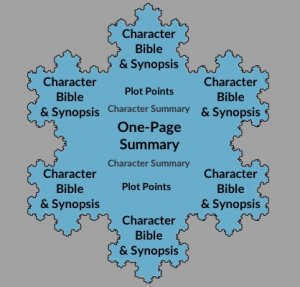
This is the first stage where you, the story designer, will roll up your sleeves and get your hands dirty. Armed with your short character summaries and your one-page plot, you will now create a one-page dossier for each major character (and a half-page for the minor ones).
If you want a bit more guidance, you can find various online guides to fleshing out characters or download this free sheet. By going deep into your major characters’ backstories, you’ll likely discover reasons why they might behave in a certain way during your story.
Once your character bible is complete, you then write a synopsis for each character. This involves outlining each character’s journey through the novel. This is perhaps one of the most useful parts of the snowflake method — especially when you’re writing for plot-heavy genres such as mystery or suspense. What a character knows at any given point in the book will factor heavily into whether the story ‘works’.
So let’s take stock: you have a long synopsis, character bibles, and fleshed-out story threads for each character. This leaves only one step in your preparation.
Step 6. Write a four-page synopsis and scene list
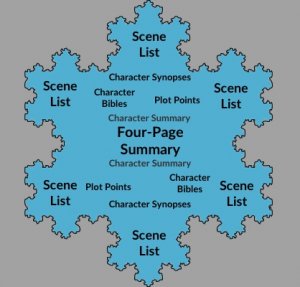
Remember how you expanded every sentence of your short synopsis into paragraphs to form your long synopsis? Here, you effectively do the same: taking every paragraph from the long synopsis and letting them breathe over a page each. Naturally, you might get the urge to write more descriptively, but resist that urge and keep every sentence just as tightly focused as before.
And then, last of all, you’ll want to draft out a scene list, where you detail exactly what will happen in every scene of your book.
Of course, there’s much more to the process than what’s been listed above. If you want to hear it straight from the horse’s mouth, you can always buy and read Ingermanson’s book on the Snowflake Method.
Check out some of them here:
❄️ Nail the snowflake method with the help of a book coach.
Kenneth Z.
Available to hire
What do you get when you combine an MFA, a decade of professional editing experience, and far too many wings and donuts? This guy.
Britny P.
Available to hire
Britny (she/they) is a YA fiction and pop culture non-fiction editor with over 7 years of traditional publishing experience.
Mike L.
Available to hire
20+ years in publishing. Ghostwritten 3 NYT bestsellers, edited/co-written/coached 50 Amazon #1s. Nonfiction, business, career, faith
Things to remember
Watch out you don’t find yourself bogged down in analysis and not actually writing anything!
Going back and revising previous stages is not just okay: it's encouraged! This shows your characters are telling you more about your story. Major changes (your protagonist is no longer a lawyer encountering family troubles, but a high witch of a faraway fantastical land) might call for a start-over, but little additions and tweaks are all part of the joy of the process.
Seek intricacy, not perfection. Keep up the forward momentum and don’t worry about making every stage perfect before moving on. Every step of this method is intended to be a springboard and move you onto the next stage — not roadblocks designed to hinder you.
Many writers swear by the snowflake method — but ultimately, the only way to see if it will work for you is to try it. Even if you find yourself deviating from it at some point, at the very least, it can help you get a running start by crystallizing those crucial first story elements.




5 responses
Andreas says:
13/06/2019 – 01:57
Could you give examples on the 5 sentences of part 2?
Amazing Blair Peery says:
16/06/2019 – 17:01
I second Andreas: Please show us the 5 bulleted sentences that would have been written for, say, "Gone With the Wind" or Star Wars". That would help us understand the concepts better. Thanks!
↪️ Martin Cavannagh replied:
17/06/2019 – 12:47
Martin from Reedsy here. I'm happy to take a bash using Star Wars as an example. 1. The exposition — Luke, a young farm boy on a desert planet dreams of excitement. 2. First plot point — Luke discovers a message from a princess in trouble and recruits a Jedi master and a smuggler to go save her. 3. Mid-point — Luke successfully rescues the princess but his mentor sacrifices himself so that the team can make their escape. 4. Plot point two — The villain closes in on the rebel base and as Luke prepares to defend it, Han decides to bail on him. 5. Climax and denouement — Luke discover his force powers, and Han has a change of heart — together they destroy the death star and save the day. Medals for everyone!
Rosanne says:
30/08/2019 – 15:34
I used this method to write my first novel and an abbreviated version for the 2nd and 3rd book of that trilogy.
Alicia O Williams says:
21/09/2019 – 05:47
Thank you for expanding more on this outline.