
Last updated on Jan 16, 2023
How to Make a Book: Build a Beautiful Hardback by Hand
About the author
Reedsy's editorial team is a diverse group of industry experts devoted to helping authors write and publish beautiful books.
More about the Reedsy Editorial Team →Martin Cavannagh
Head of Content at Reedsy, Martin has spent over eight years helping writers turn their ambitions into reality. As a voice in the indie publishing space, he has written for a number of outlets and spoken at conferences, including the 2024 Writers Summit at the London Book Fair.
View profile →When we talk about how to make a book in 2025, we often talk about exporting files to Kindles and other ebook readers. But what about the old-fashioned art of making a book by hand? Some say that bookbinding is a dying art — but we reckon it’s due for a comeback.
In this post, we’ll show you how to make a beautiful book. Not just any blank tome but a beautiful novel, memoir, or non-fiction book — formatted to a professional standard, and bound in a hardback cover. And the best part is that it should cost you no more than fifteen or twenty dollars!
So if you’ve written a piece of fiction or non-fiction and you want to know how to make a copy that you can gift to someone special (or have as a keepsake), simply follow all the steps below. Or if you’re looking to create a blank notebook, feel free to jump straight to step four.
How to make a book:
1. Compile the content for the project
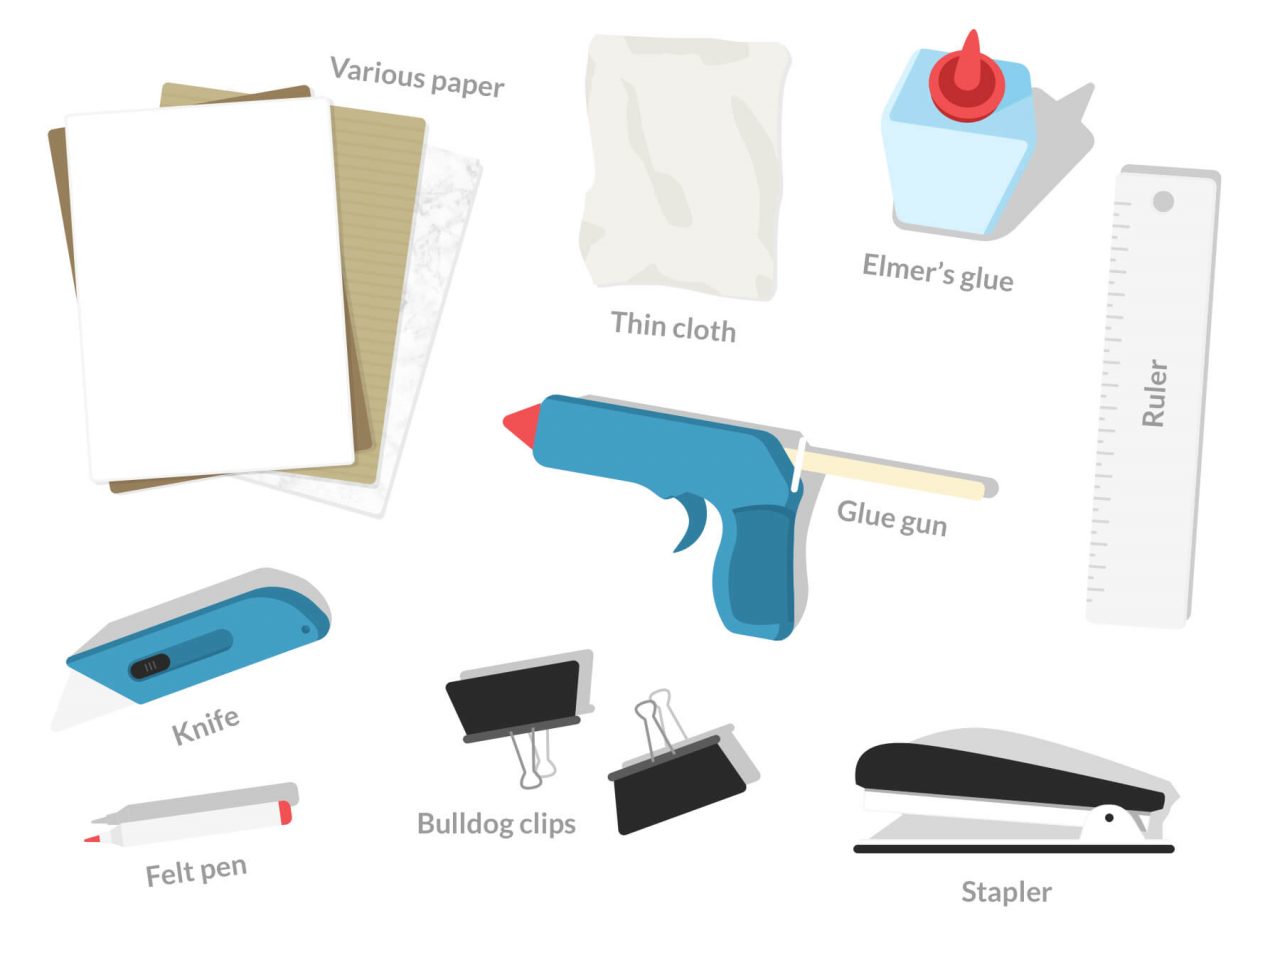
Here's what you'll need:
- Printing Paper (A4 or Letter Size), uncoated 70-80 gsm
- 2 sheets of decorated paper (A4 or Letter size), 90-100gsm
- Elmer’s glue (or PVA Glue)
- Hot melt glue gun (they cost, like, ten bucks)
- Craft knife
- Large bulldog clips
- Good-quality material or paper (for your cover)
- Thin fabric (large handkerchief, perhaps, or a purpose-made bookcloth)
- Metal ruler
- Felt Pen
- Stapler
- High-quality cardboard
Once you have these 'ingredients' in place, you're ready to learn how to make a book.
2. Format the pages
This is where we digitally typeset your book of choice and arrange the pages in a way that will help us seamlessly bind it. There are a few pieces of software that will allow you to typeset a book. However, we will recommend you use Reedsy Studio, for three reasons:
- It creates professional-grade print-ready files that are easy to read
- It requires no training and has next to no learning curve
- It’s free
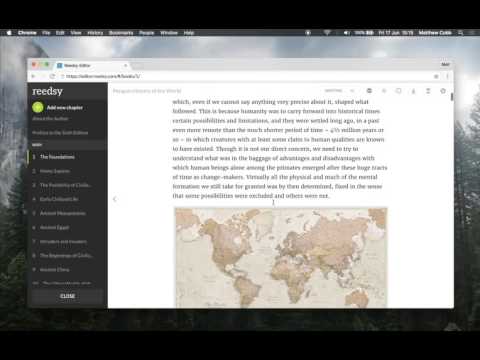
It just so happens to be made by our team at Reedsy — but that’s how we know that it'd be one of the best tools for the job, even if it wasn’t free. It automatically creates your copyright page and handles text like a dream. To see how to use the editor to format your book, check out this video made by our designer, Matt:
And for a written breakdown of the book formatting process, check out our article here.
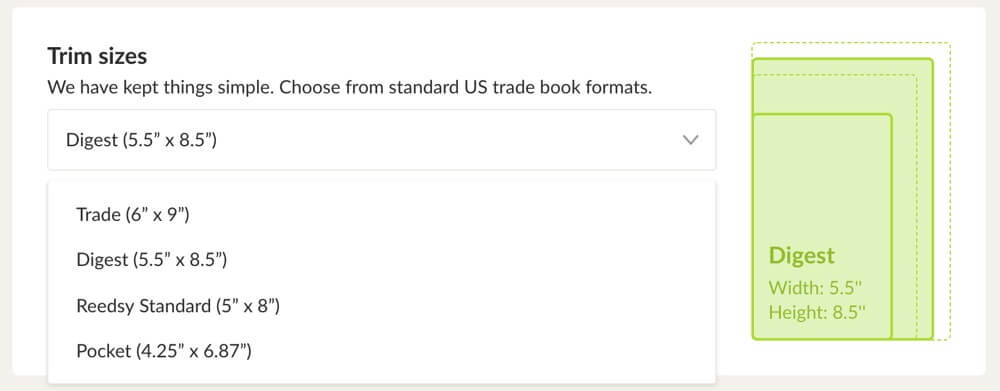
When you export your book, you’ll get a number of trim size options. Select Digest (5.5” x 8.5”), which is exactly the size of a piece of Letter paper folded in half.
Then, once you’ve exported your file as a PDF, you can then move onto the printing process.
Free course: Self-Publishing 101
Join the self-publishing revolution and become an indie bestseller with this 10-day online course. Get started now.
3. Print the book on paper
If you were to tear almost any hardcover edition apart, you will see that they’re actually made up of individual booklets of paper bound together by glue or thread. These are called folios, and they’re made up of folded ‘signatures.’
What is a signature?
A signature is a single piece of paper with pages of text printed on both sides. They are folded (and sometimes cut) before being assembled into a folio – which is essentially a booklet.
Fun fact: The number of pages in a folio is always a multiple of four — often 16 or 32 pages. That’s why you often see blank pages at the end of a book.
For our project, the signatures will be single sheets of letter-sized paper with two pages printed on each side. We will assemble eight signatures into folios that house 32 pages of our book. Because of how each piece of paper nestles into this arrangement, each signature must be printed in a specific order — and we'll show you how to do that.
Download Adobe Acrobat Pro
Seeing as we’re dealing with PDFs, why not use the tool created by the people who invented the PDF? Adobe Acrobat Pro is a paid-for tool, but the good news is that just about all Adobe’s creative software comes with a free 30-Day trial.
Once you’ve downloaded the software, open the PDF file.
Make sure your pages are labeled correctly
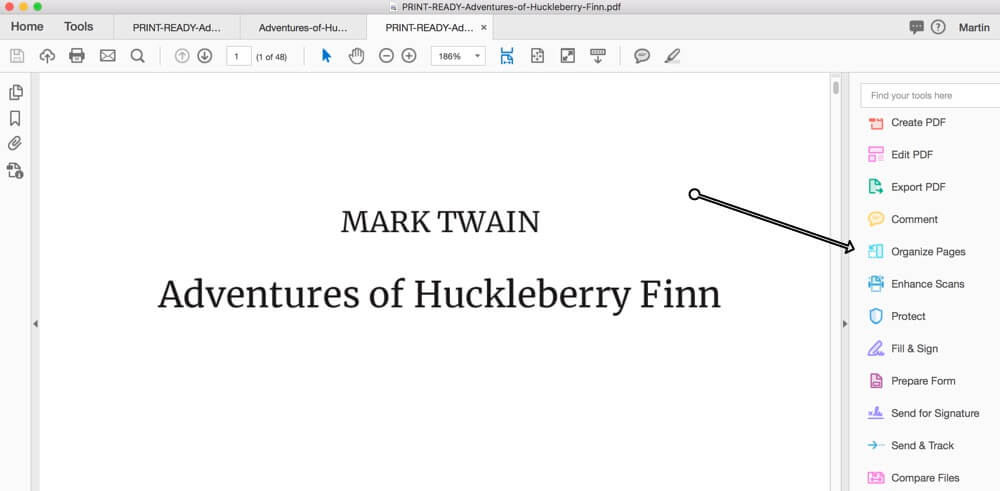
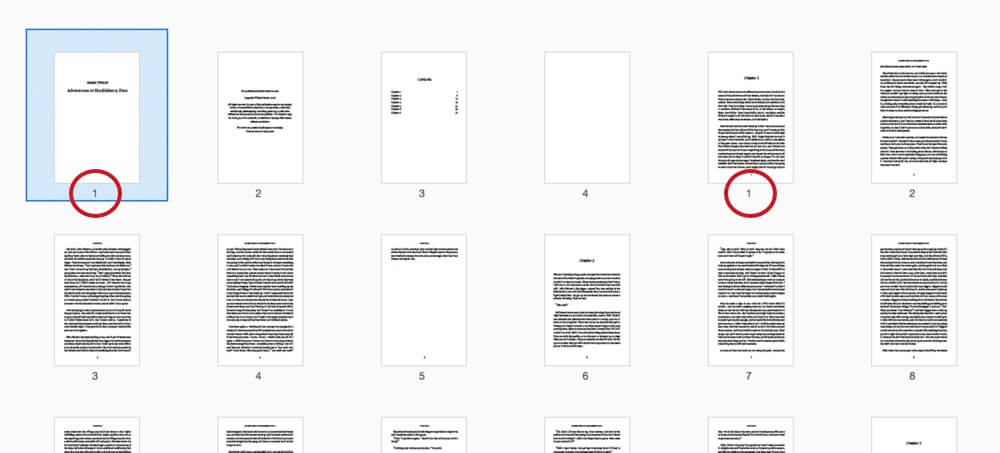
When you first open the file in Adobe, select “Organize Pages” to see all your pages laid out.
The first thing you’ll need to check is that all the pages are numbered correctly. If you see the page numbers go back to 1 after the front matter (title page, copyright page, etc), you will need to reset the page labels so that it will print properly:
If this is the case, right-click the first page and choose 'Page Numbering.' Then where “Selected” is highlighted, change the setting to 'All.'
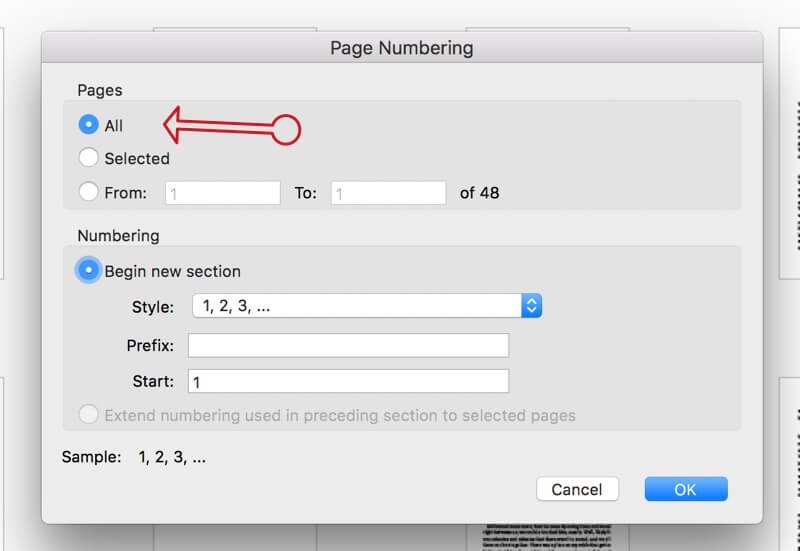
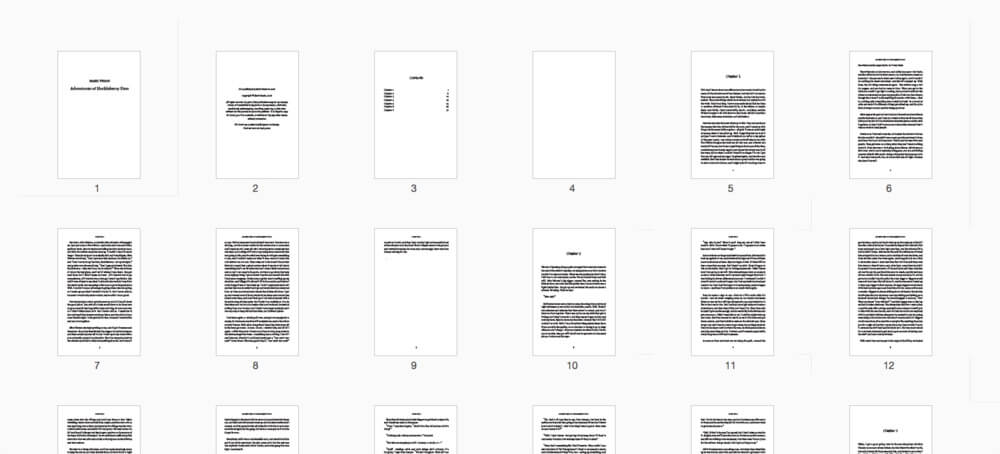
This will then label all the pages sequentially and you’re just about ready to print!
Print your book in 32-page booklets
Hit ‘Print,’ and you will see the option to print a booklet that will properly arrange your book into signatures. However, to make sure you don’t just crank out a single unwieldy booklet, print the book 32 pages at a time. Here's how you do it:
- Select 'Pages' and type in 1 - 32.
- Under 'Page Sizing & Handling,' select 'Booklet':
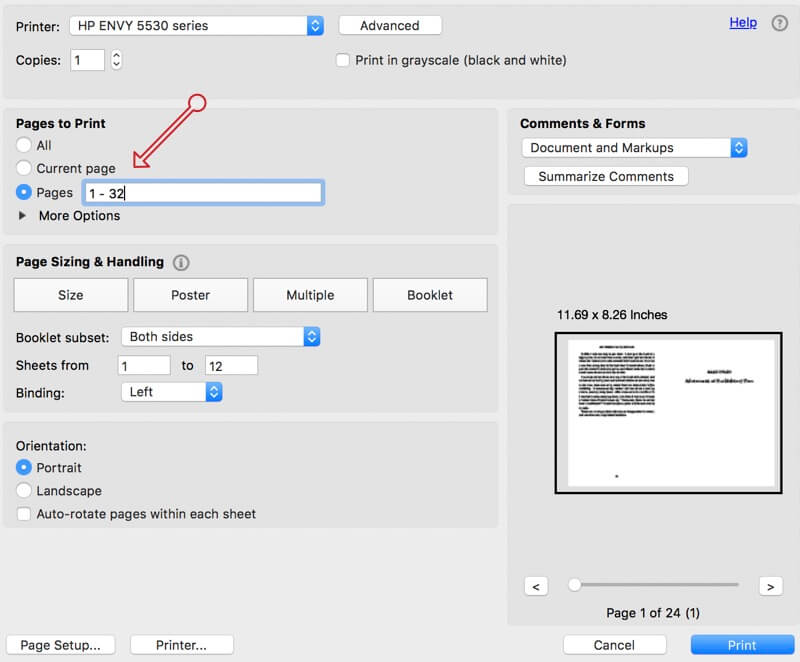
- Then print out pages 1 -32.
- The pages will need to be printed on both sides of the paper. If your printer supports ‘duplex printing’ it will automatically print on both sides. Otherwise, you’ll need to flip the papers halfway through.
- You will now have the first 32 pages printed out.
- Then repeat the process with:
- Pages 33 - 64
- Pages 65 - 96
- Pages 97 - 128
- And so on….
You may wish to print out multiple copies. If you slip up later in the process, you won’t have to start all over again. Or, if you want to give it a few tries to make a perfectly bound copy, this will give you that leeway.
Top tip: If this sounds too complex, you can go to your local copy shop (Kinkos, et al) and explain to the assistant what you're doing. They'll be more than happy to help.
Choosing the right paper
A massive part of the reading experience comes from feeling the paper under your fingers as you flip through the pages — so selecting the right paper stock is essential. If the paper is too thin and light, the more delicate it will be during the binding process. Choose a stock that's too heavy and thick, then you’ll have trouble folding the signatures (and preventing your novella from looking like a doorstop).
You can source your paper online. Or, even better, go to a stationery store where you can get your hands on the stock before you buy it. If your aim is to create a book that feels professional, our advice is to look for a paper stock that’s:
- Uncoated
- 70 or 80 gsm (grams per square meter)
If you like the idea of using recycled paper — that’s great. Just check out a sample before you commit to buying a ream.
4. Assemble the binding for the spine
You should now have your entire book printed and separated into folios made of eight sheets of paper (upon which 32 pages are printed).
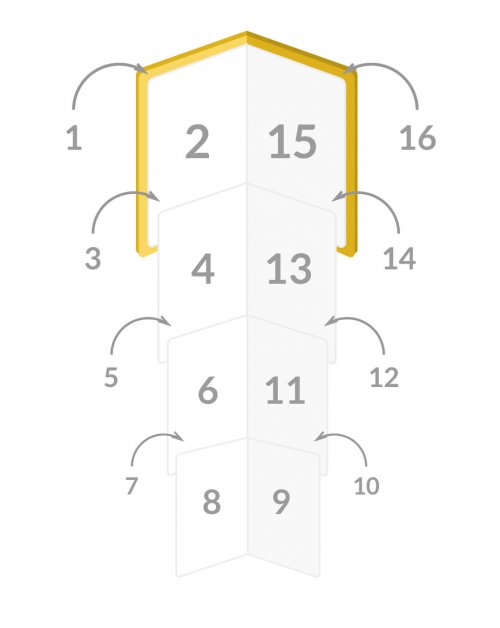
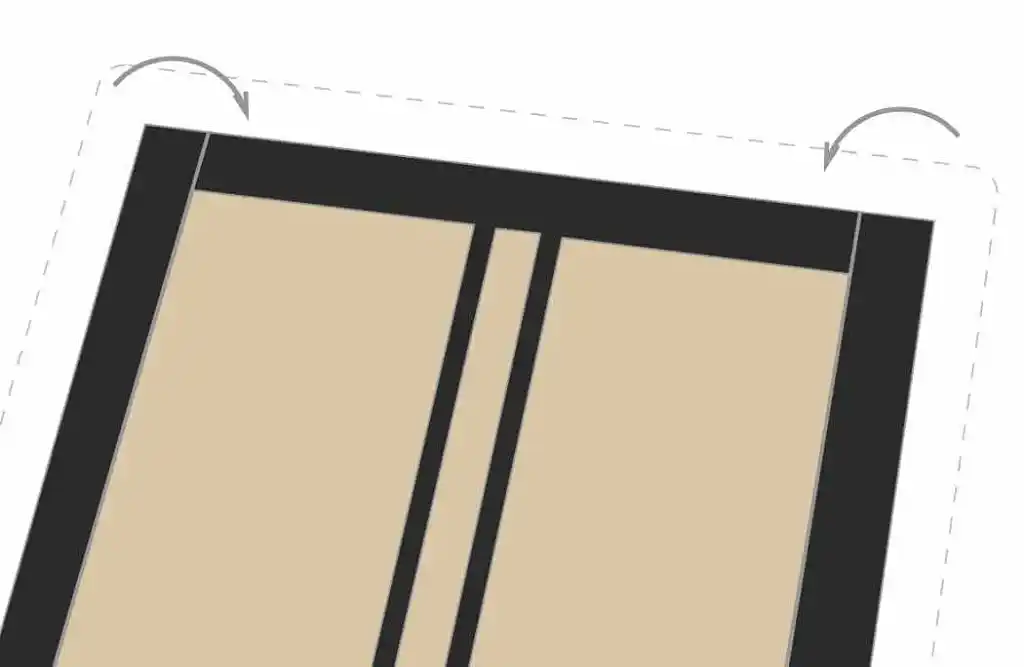
Take the sheets that pages 1 - 32 are printed on and carefully fold each page in half — taking care to do it in the right direction. Then carefully assemble them in the right order and use an open stapler to secure them together like so:
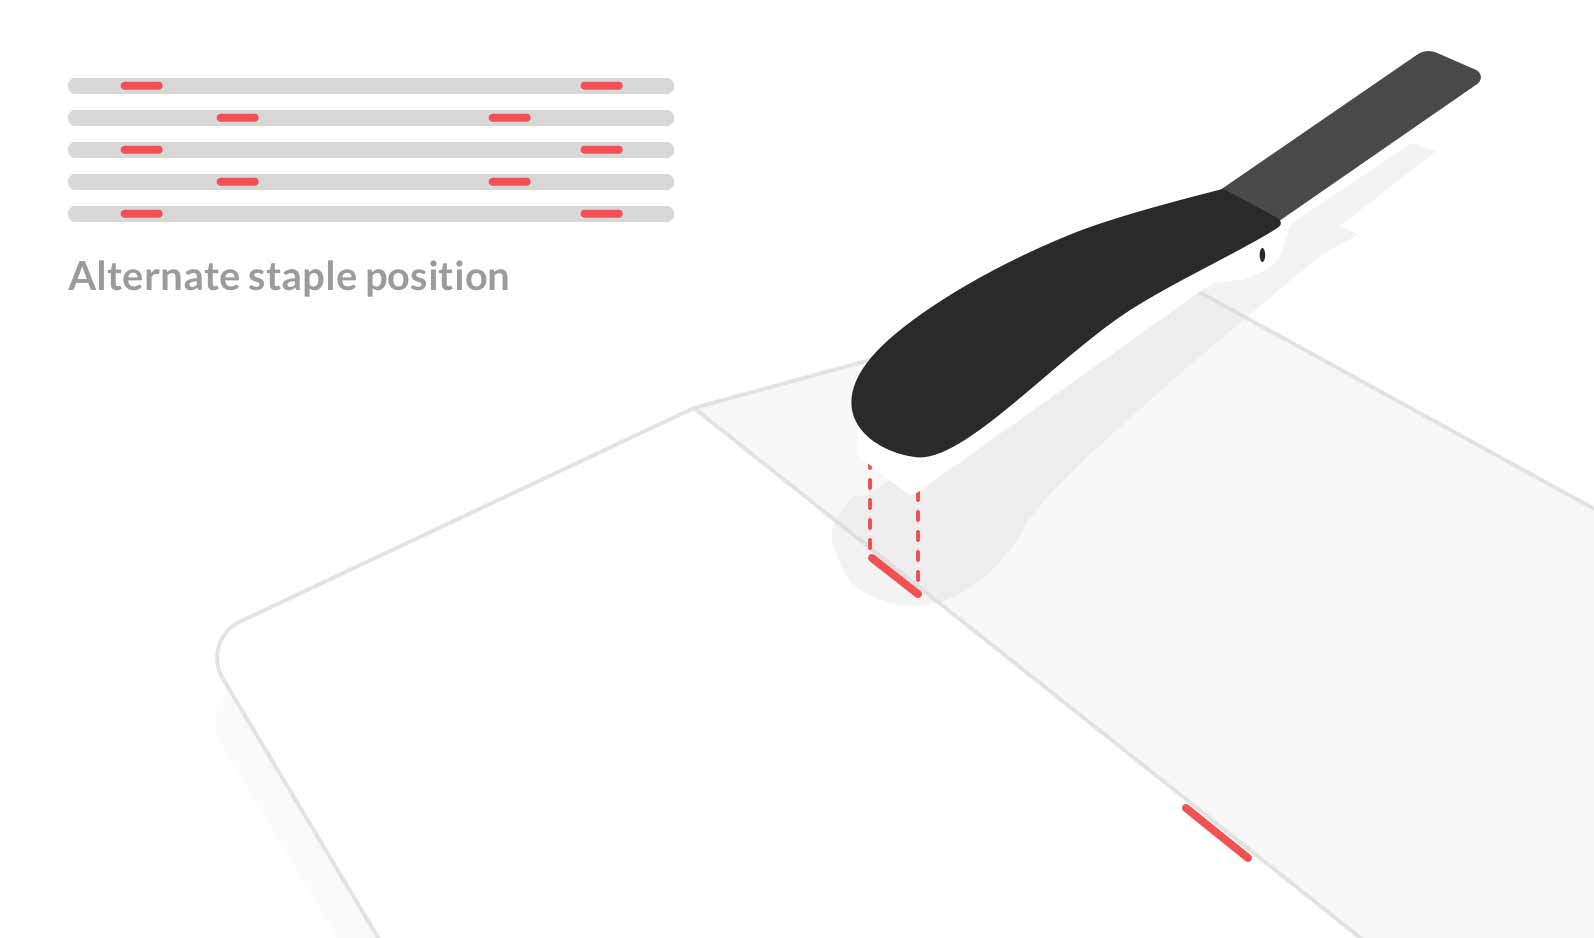
You can staple them on a folded bath towel or an old pair of jeans so that you don’t damage your table. You will also have to bend the points of the staples with your own hands (or using a metal ruler, if you want to spare your fingers).
Between folios, you will want to alternate where you place the staples on the spine so that they don't bulge in places. You can arrange them as in the diagram above.
You will want the pages to be folded as tightly as possible — to achieve this, you can join them with an elastic band and then compress them under a stack of hardbacks and other heavy objects. If you want to, you can leave them there overnight.
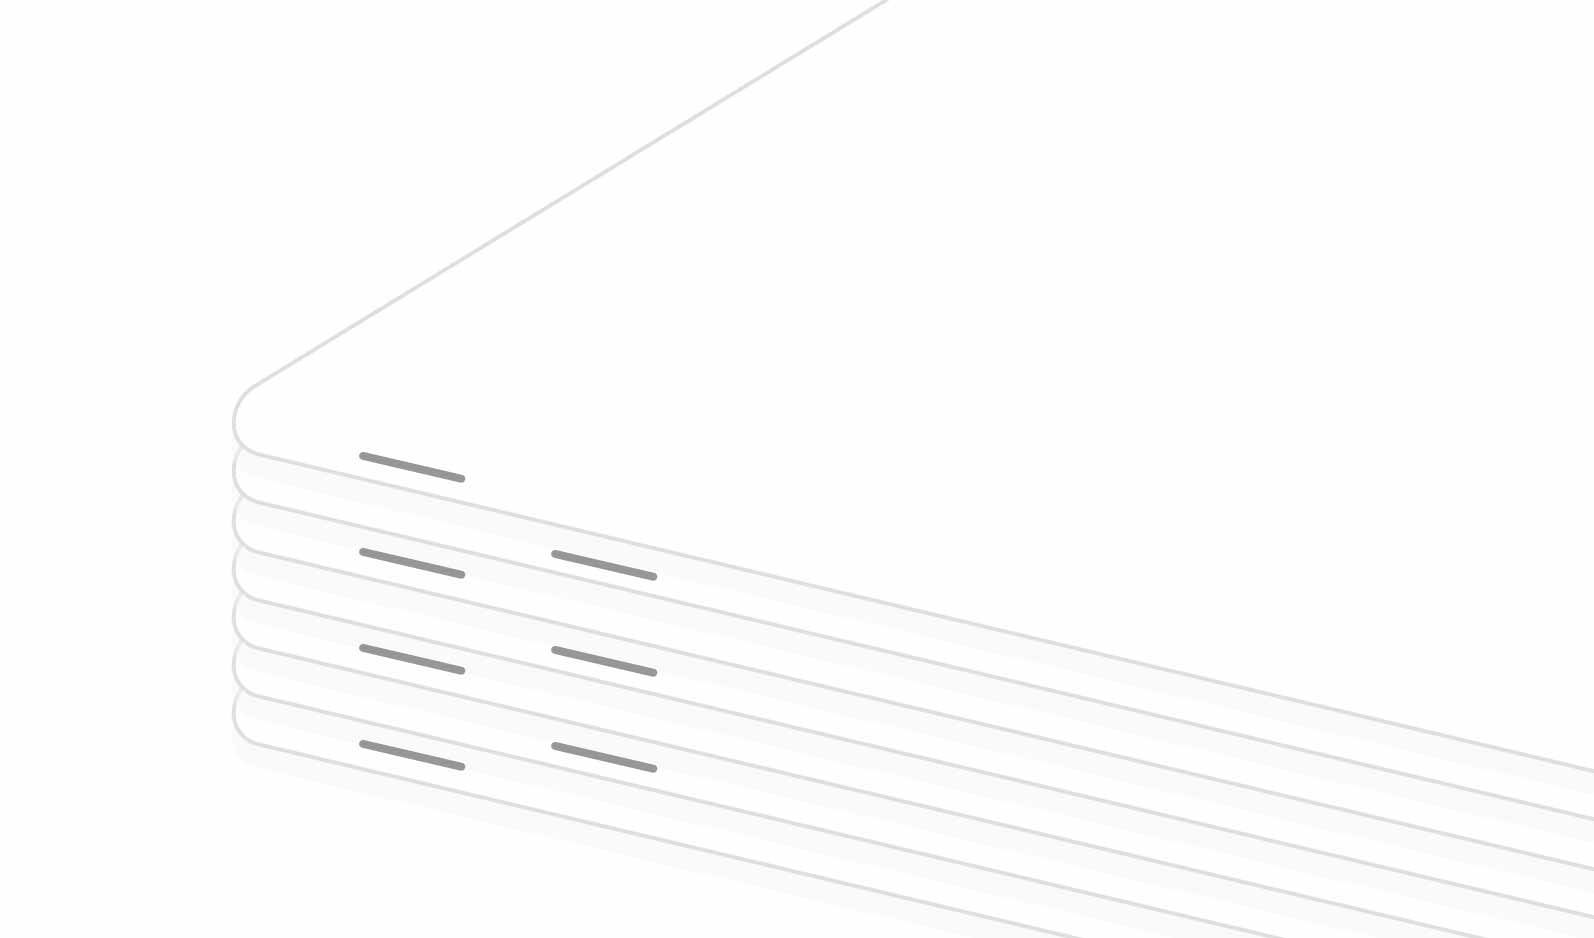
And there you have it: your entire book, in a stack of 32-page folios.
Now it’s time to bind these folios together. In some bookbinding processes, stitching is used to join the folios, but in our case, we will use hot glue.
Keep your stack of folios neatly in order with your bulldog clips. Apply hot glue along the spines of the folios — taking care not to use too much glue so that it drips between the folios.
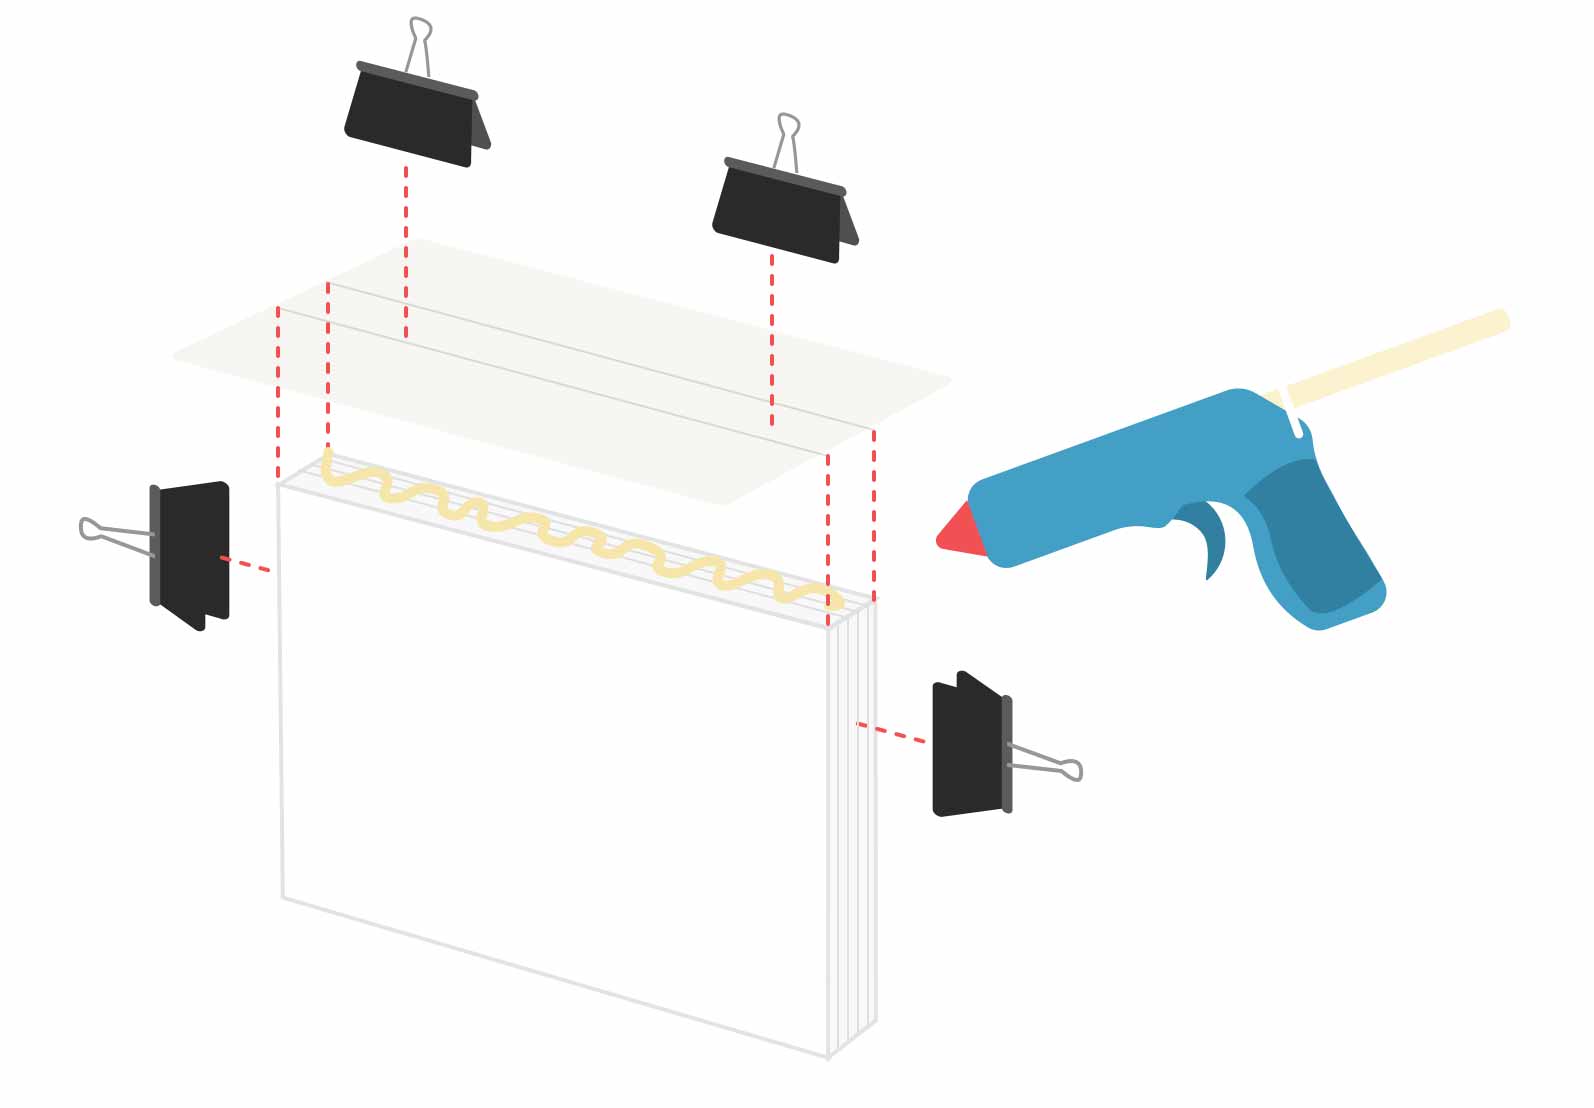
Before the glue cools, apply the fabric to the spine. The fabric should only be affixed to the spine edge of the book — the sections that fall over the front and back cover should be free. Secure the fabric and the folios with bulldog clips.
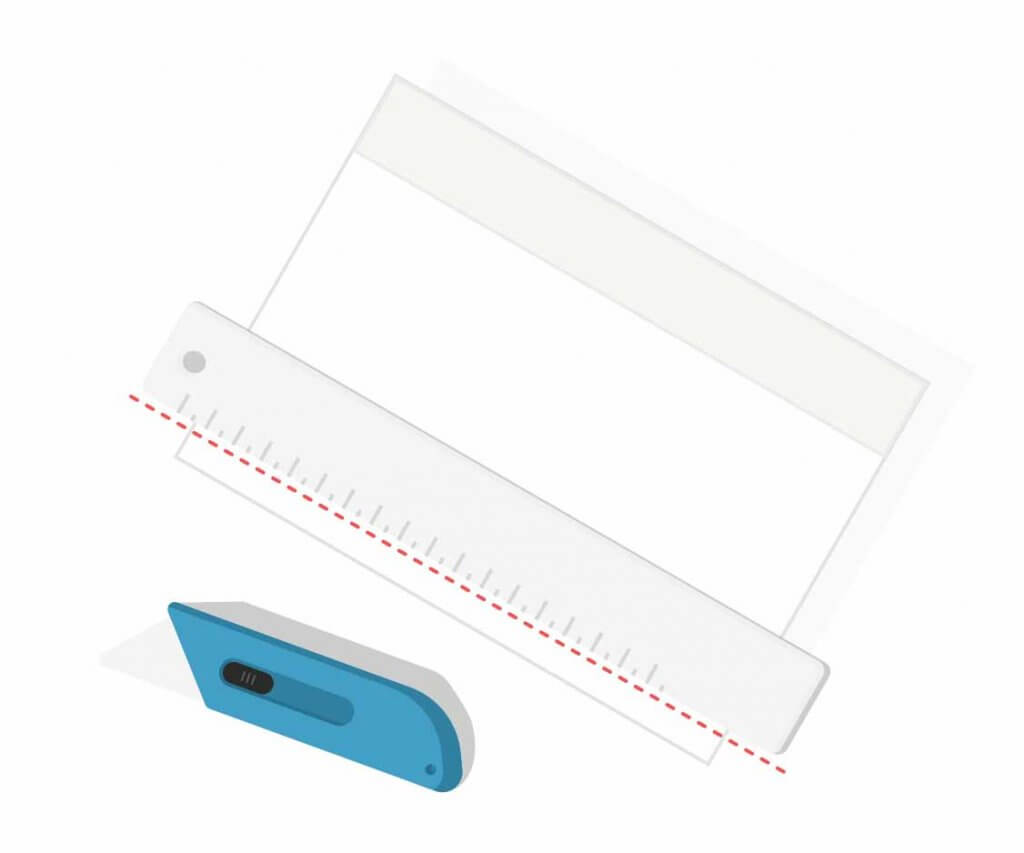 When the glue cools and sets (you may wish to leave it for a few hours) you will notice that the pages are not all perfectly in line. This is normal. Using your craft knife and ruler, trim away the excess paper until every page is neatly in line.
In the best case scenario, you will only have to trim the edge opposite the spine.
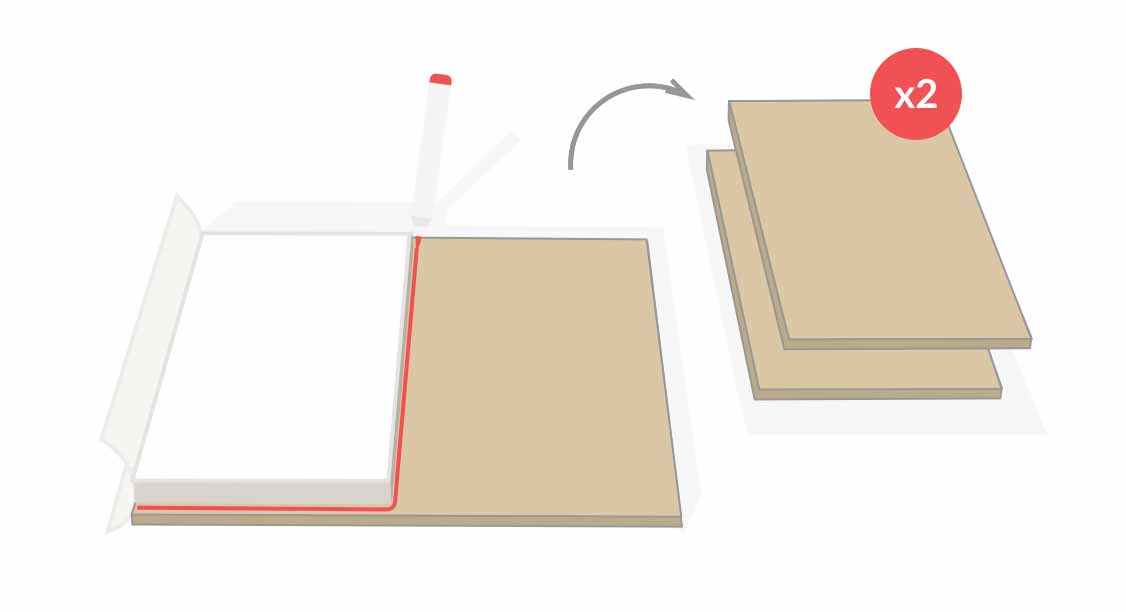
5. Create the cardboard book cover
Use your stack of folios to measure out two identical hardcovers on your pieces of cardboard. They should ideally be a millimeter-or-so larger than your pages.
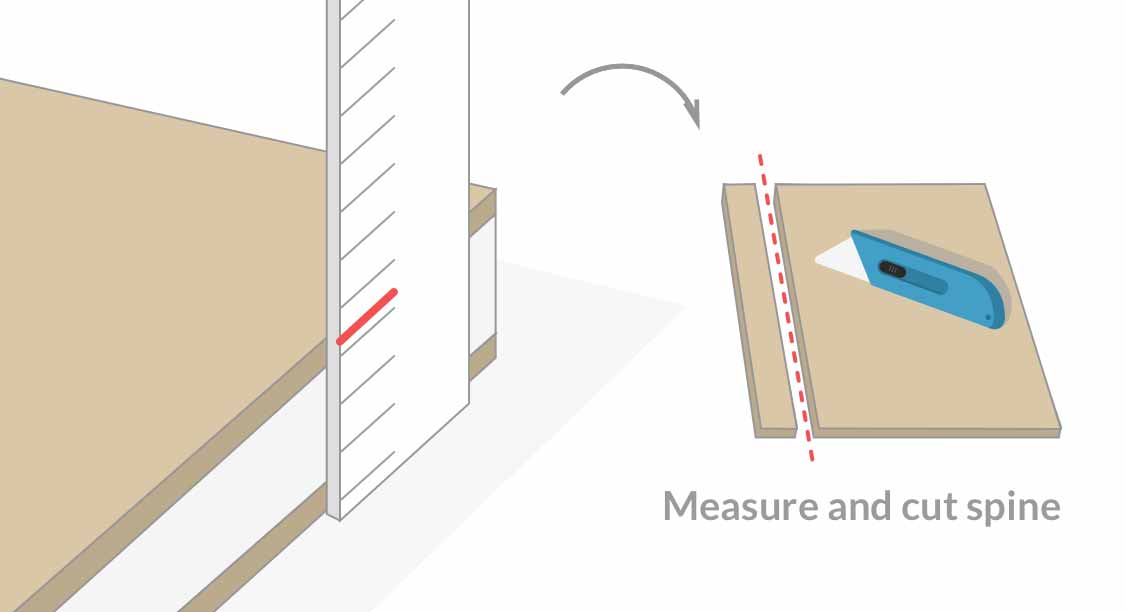
Then, measure out a spine. This should have the same height as your front and back covers, while the width of the spine should equal the thickness of your bound folios AND both covers.
Using Elmer’s (or PVA) glue, affix the front and back cover and spine to the book cover paper or material. Leave one-and-a-half times the thickness of the card between the covers and spines). There should also be an inch of extra material around all sides. Make sure that the glue is spread evenly, and use a credit card to push out any bubbles that may have formed.
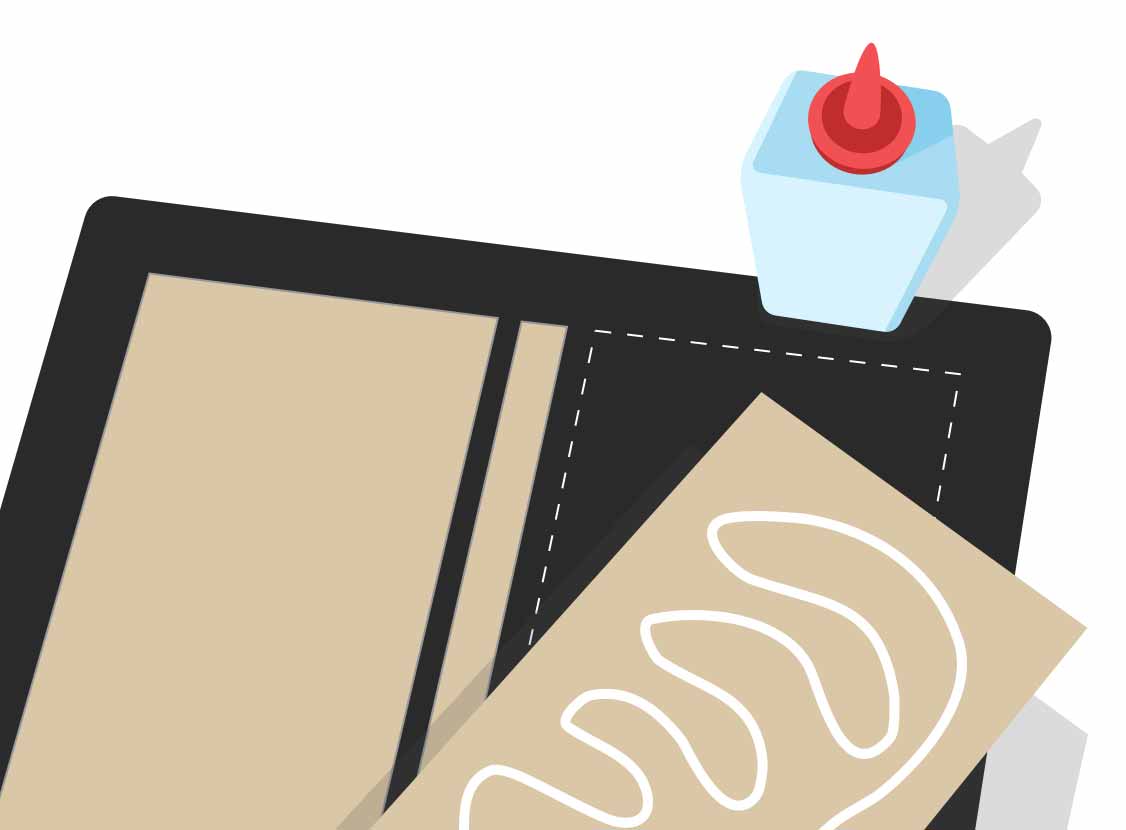
Apply more glue to the inside of the cover and wrap the material around like so:
6. Join the pieces to make your book
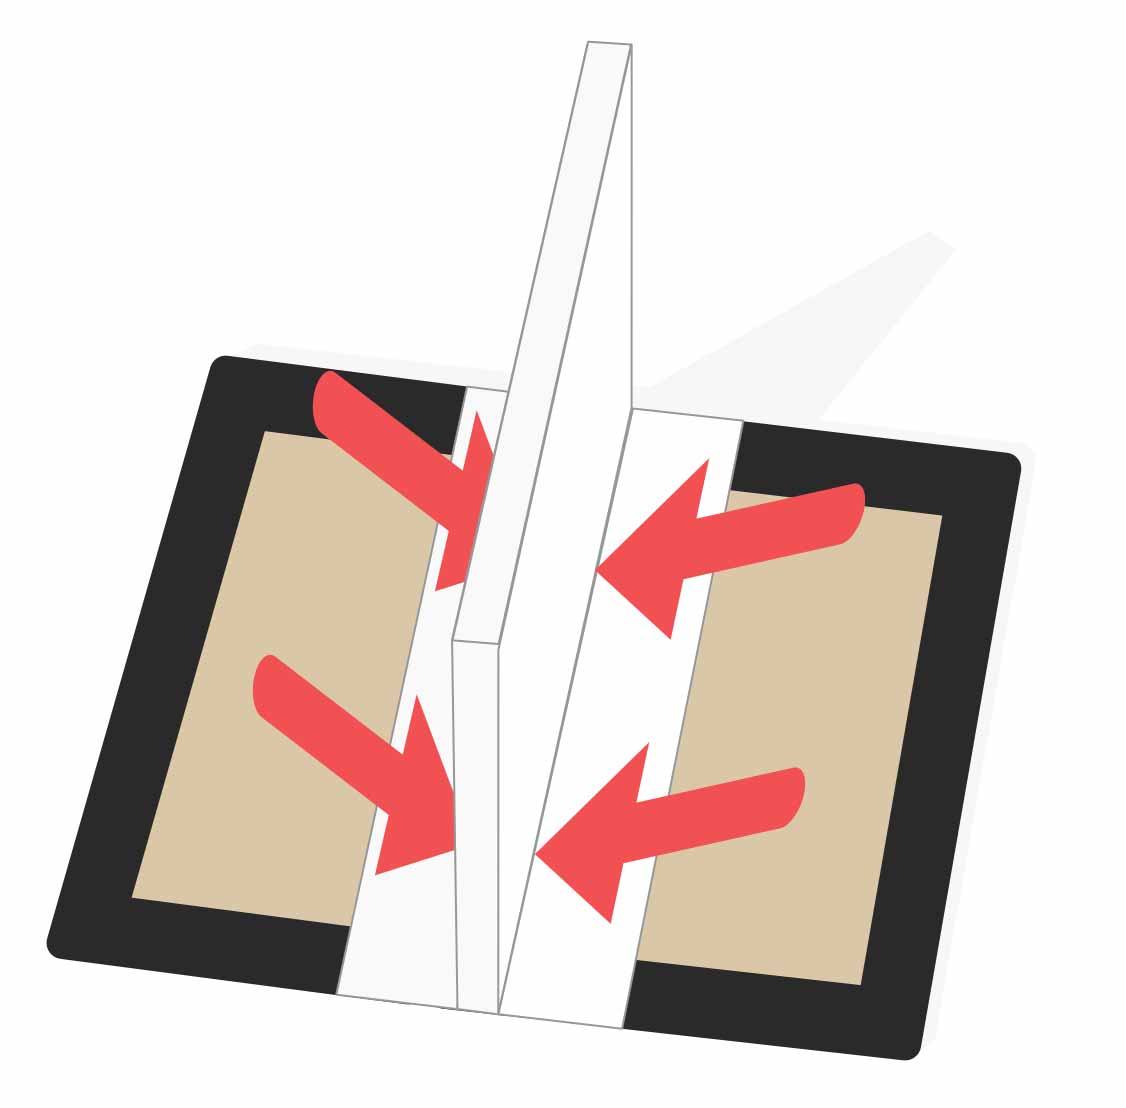
This part is a little delicate and will have a lasting impact on readability. The bound folio will now be attached to the hardcover. The loose wings of fabric on both sides of the spine will be affixed to the front and back covers using Elmer's glue.
Warning: No glue should touch the spine board or the fabric on the spine of your bundle. Make sure they don’t stick together in any way.
Let these dry for an hour or two. Keep the covers open and clear of the pages. The best way to do this is by lying it on its back and propping the body up using other hardbacks.
Take the decorated lining paper and trim it so that it can be glued flush with the first page. Then when the book is ready, apply a thin layer of glue to the front cover and the first page, and stick on the lining paper. (Note that the amount of glue shown in the diagram is just for illustration purposes. Use just enough adhesive to cover the entire surface and ensure a solid stick.)
Repeat this process with the back cover.

7. Design a dust jacket
Once you've joined all the pieces of your book together, an optional but highly recommended (and fun) final step is to design a stunning dust jacket for it. Not only can a dust jacket tie the project together (and protect your cardboard hardcover from damage), but it also adds a finishing touch to make your self-made book match any professionally-made book on the market.
A naked hardback can be beautiful on its own, but the common practice is to create a dust jacket that captures the essence of the book and clearly highlights what it's all about. Perhaps you've made your own version of your favorite public domain book because you can't find any covers that you like? This is your chance to rectify that.
You can design a dust jacket by yourself in book cover design software such as Canva or InDesign, or you can hire a professional designer to make your final product pop on your shelf.
Meet the best designers in the industry on Reedsy
And give your book a professional cover that readers will love
Learn how Reedsy can help you craft a beautiful book.
And there you have it! A beautiful work of art that will take pride of place on your bookshelf — and you made it all by yourself. Congratulations!
If you have any questions about making a book or using Reedsy’s formatting tool, drop us a comment in the box below.


1 response
Gabriella L Garlock says:
10/04/2018 – 22:12
This is really cool! just to know the directions are out there. I have studied bibliography, but it was long ago and of course it's an art some think is on the way out. Anyway, I've been making my own books with varying levels of finesse since I was a child, so there's a visceral satisfaction to the know-how. It would be interesting to have instructions on the stitching option as well, but I suspect we use the wrong kind of paper these days.